Sunday, February 12, 2012

Grapefruit Hypocrite Pie


For those of you not lucky enough to have met her, my sister is a badass. She's an amazing singer/songwriter, one of the founders of Girl's Rock Charleston, and just as cute as a button. This past Christmas she knocked it out of the park: not only did she get me a first-edition copy of a flat-out incredible book on old-time North Carolina cooking, but she also splurged on this beautiful copy of the Momofuku Milk Bar cookbook by Christina Tosi.


I was totally enraptured by these books over the holidays, and I immediately started researching and accumulating the slightly out-there ingredients (citric acid, glucose) and equipment (new beater blade, acetate strips) I'd need to get rolling. Since then, I've made four or five recipes out of the Milk Bar cookbook, each one insanely sweet and over the top in its own amazing way, but from day one I had my eye on the grapefruit pie. It took a trip to a Hispanic grocery store in NC to get a hold of the necessary ingredients, but six weeks later, I finally had everything I needed.

This guy traveled a long way to get here.

As I learned from Beth Tartan, a more accurate name for this pie would be a grapefruit hypocrite pie, since the top layer disguises another layer of filling below it. According to the cookbook, the inspirations for this recipe were the Ohio Shaker pie (wherein thinly sliced lemons are tenderized in sugar and salt) and the key lime pie. The translation of these ideas to grapefruit is inspired, and the components work beautifully together.

Blooming the gelatin for the grapefruit passion curd.

The grapefruit pie starts off with a baked Ritz crunch pie shell, which provides the perfect sweet/buttery/salty counterbalance to the citrus explosion of the filling. Next up, a simple curd combines the bright, broadly "fruity" flavor of passionfruit pulp with the creamy mouthfeel of custard filling, into which grapefruit threads are stirred. This step, which involves suprêming the grapefruit (cutting away the rind and pith and slicing between the membranes) and spooning the segments over themselves in a warm, neutral oil, was pure magic.

Suprêming the grapefruit.

Suspended grapefruit threads.

Finally, sweetened condensed milk is curdled with grapefruit juice and citric acid, colored a velvety pink with a single drop of red food coloring, and poured over the grapefruit passion curd. The overall effect is something to behold. Each bite combines the salty, buttery base of the Ritz crackers, pockets of fresh grapefruit juice embedded in a rich pastry cream, and the tart brightness of the key lime pie-inspired top layer. Both the process and result are totally unique and really speak to Christina Tosi's talents.

Sweetened condensed grapefruit, featuring my new mixing tool (thanks Hendrens!)

Ritz Crunch Pie Shell
  • 1 sleeve Ritz crackers
  • 1/2 c (100 g) sugar
  • 1/4 c (20 g) powdered milk
  • 1/2 tsp kosher salt
  • 7 Tbsp butter, melted
  1. Heat the oven to 275 deg F.
  2. Crush the Ritz crackers with your hands into small pieces. Combine all the ingredients and press with your hands into a 10" pie pan, making sure to completely cover the bottom and sides of the pan.
  3. Bake the pie shell for 20 minutes until golden brown. Cooled completely, it can be stored, wrapped in plastic, in the freezer for up to 2 months.

Grapefruit Passion Curd
  • 1/4 c (50 g) passion fruit puree, thawed
  • 3 Tbsp (40 g) sugar
  • 1 egg
  • 1/2 gelatin sheet, or 1/4 tsp powdered gelatin
  • 6 Tbsp very cold butter
  • 1/4 tsp kosher salt
  • 1 large grapefruit
  • 1 tsp grapeseed oil, or other neutral oil
  1. Whisk the fruit puree and sugar until the sugar has dissolved.
  2. Add the egg and vigorously whisk until the mixture is bright orange-yellow. Transfer to a saucepan.
  3. Bloom the gelatin by sprinkling evenly over 1 Tbsp of water and letting hydrate for 5 minutes. Heat the passion fruit mixture over low heat, whisking regularly, until it just comes to a boil. The mixture will thicken considerably: once very thick, remove from heat.
  4. Transfer the mixture to a blender and add the bloomed gelatin, butter, and salt. Blend until the mixture is shiny and smooth. Transfer to a heatproof container and allow to cool completely at room temperature, then the refrigerator, for 30 to 60 minutes.
  5. Suprême the grapefruit using the directions above.
  6. Gently warm the grapefruit segments in a small saucepan with the oil. After 2 minutes of gently spooning the grapefruit over itself, the segments will have separated into grapefruit threads.
  7. Stir the grapefruit threads into the chilled curd.

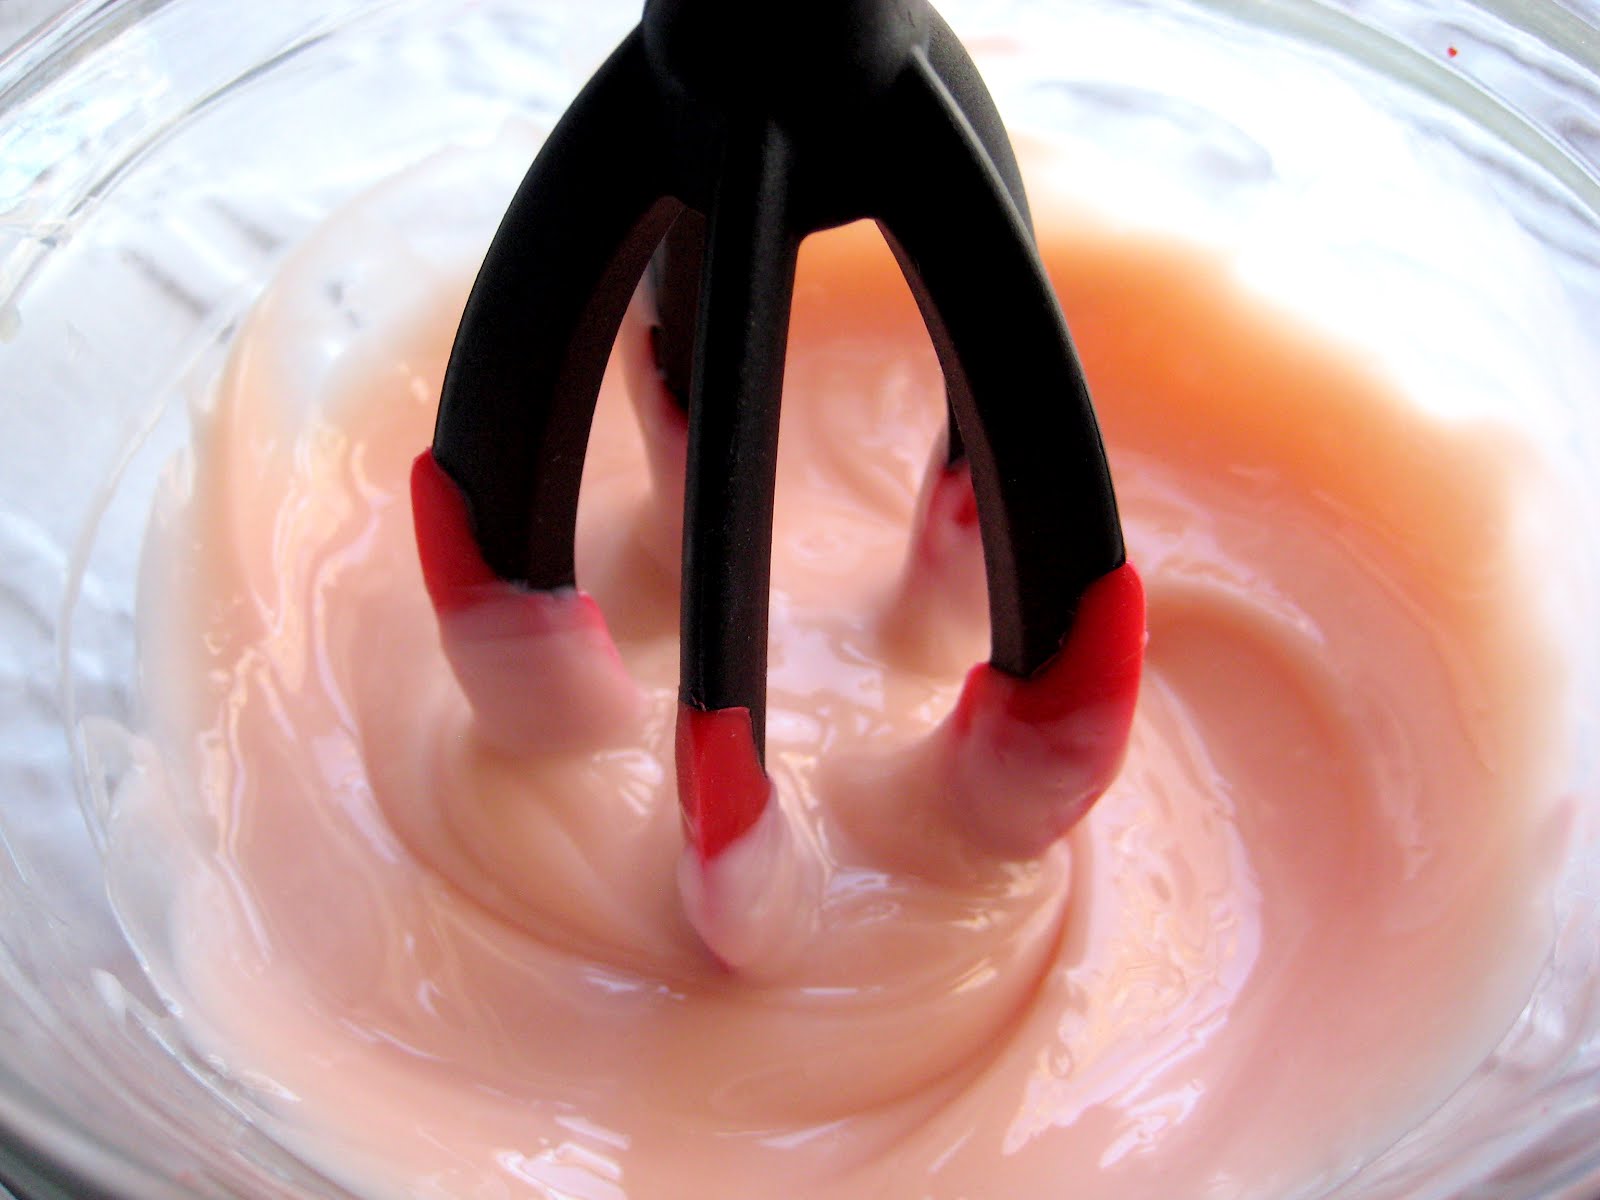
Sweetened Condensed Grapefruit
  • 3/4 c (225 g) sweetened condensed milk
  • 2 Tbsp (30 g) ruby red grapefruit juice
  • 1/2 tsp kosher salt
  • 1/2 tsp citric acid
  • 1 drop red food colering
  1. Combine all ingredients and mix with a rubber spatula, folding until the mixture is homogeneous.
  2. Use immmediately or store in the fridge for up to 2 weeks.
Layer the curd and sweetened condensed grapefruit in the chilled pie shell, smoothing each layer and making sure not to mix the two. Once assembled, either place the pie in the freezer (at which point it can be held, wrapped gently in plastic, for up to one month) or hold in the refrigerator until ready to slice and serve. Allow to fully thaw before serving.

Monday, December 5, 2011

Speculoos

Because there's nothing quite as exciting as seasonal cookies, I present to you a recipe for speculoos, ripped wholesale from the pages of Baked Explorations.


Just like its precursor, this cookbook is solid gold. Almost every recipe has an interesting backstory or a tantalizing gimmick, and the entry for speculoos (alternately "speculaas," as they're called in this cookbook) is no exception. The idea was to recreate those Biscoff cookies you're sometimes lucky enough to get on Delta flights. Biscoff are in fact a brand of speculoos, a Dutch sweetcrust pastry that is traditionally made the day before St. Nicholas' Day, which is celebrated on December 6.


As you can see from the recipe, most of the flavor here comes from cinnamon, with lots of cloves, ginger, and nutmeg to round things out. Obviously such a spice-forward recipe really benefits from using freshly-ground spices. Since these are "shortcrust pastries," sugar is cut into what amounts to biscuit dough (flour, leavener, and cold fat cut into the dry ingredients), which impedes gluten formation and results in a tender yet crunchy cookie. I found that a small cookie cutter (2" diameter at most) ensures that these bake past the soft cookie stage and into more of a ginger snap territory. As you can see, I cut this batch a little too large.


I suggest that you roll these out on a work surface dusted with powdered sugar instead of flour -- you get the same effect, without the taste and texture of unincorporated flour, or you could just use a couple layers of wax paper and save some time on cleanup. Best of all, using cookie cutters means you get to eat all the scraps that bake alongside the deliverables (see also the amazing jam sandwiches from last year). Happy St. Nick's Eve!

Ingredients
  • 1 3/4 c AP flour
  • 1 c packed dark brown sugar
  • 1/2 tsp baking soda
  • 1 1/2 Tbsp cinnamon
  • 1/2 tsp grated nutmeg
  • 1/2 tsp ground cloves
  • 1/2 tsp ground ginger
  • 1/2 tsp salt
  • 10 Tbsp butter, cool but not cold, cut into 1/2-in cubes
  • 1 egg, beaten
  • 1 tsp grated orange zest
  • coarse raw sugar
Directions
  1. Pulse flour, brown sugar, baking soda, baking soda, cinnamon, nutmeg, cloves, ginger, and salt in a food processor.
  2. Drop the butter over the flour mixture and pulse until the consistency of coarse sand.
  3. Add beaten egg and orange zest, and pulse once or twice to combine.
  4. Turn batter out onto a floured work surface and knead the dough until it forms a ball, taking care not to overwork the dough. Wrap the dough in plastic wrap and chill for at least one hour.
  5. Preheat the oven to 350 degrees F. Line two jelly roll pans with parchment paper.
  6. Unwrap and divide dough into halves. Roll one half out on a work surface generously dusted with powdered sugar to a thickness of about 1/4 in. Cut out cookies using a small round cookie cutter and transfer to prepared pans. Repeat with second half of dough.
  7. Generously sprinkle the cookies with coarse sugar and bake for 15 minutes, rotating halfway through. Cookies should be dark brown and appear dry on top.
  8. Transfer cookies to a cooling rack and cool completely before storing in an airtight container.

Wednesday, October 19, 2011

Visual Guide to Home Coffee Roasting


It's been about six months since I started roasting coffee at home, and in that time I've had just about every disaster you can have with such a simple task, barring an actual fire. Broken glass, charred beans, and very loud smoke alarms have given way to a ten minute routine that is not only super fun and simple but also produces consistently amazing results. If you like coffee and have $40 in your pocket, you too can save 60% on your coffee expenses (no really -- I did the math, and it's closer to 62%) and trade up for daily fresh-roasted coffee. Obviously this is an idea whose time as come. You'll need the following:

  1. A popcorn popper. I suggest the Poplite. It's got the right type of mesh at the bottom of the roasting chamber AND is the perfect canvas for the stickers you've amassed over the years.


  2. Wooden spoon with long handle. This one has been in commission for a couple of weeks. Clearly a consumable item, but one that can be replaced for under $2 at your local restaurant supply store.


  3. Metal strainer or colander. Anything will work here.


  4. Green coffee beans. Your every home coffee roasting need can be met by Tom and co. at Sweet Maria's.


  5. Oil lamp chimney. The perfect multipurpose solution to some of the basic difficulties of roasting coffee in a popcorn popper: with the combination of a chimney and a wooden spoon, you have a 3-in-1 stirrer (to make sure the beans don't burn early in the roast), container (to prevent the beans from flying out), and window (to monitor the degree of the roast).
First things first -- the little 1/2 cup scoop that comes with the popper is exactly the right measurement for one batch of coffee. Be careful not to overload the popper or you'll trigger a low-flow sensor and cause the popper to shut down for about 10 minutes. If this happens in the middle of a roast, you get to throw away a batch of incompletely roasted coffee. Also, you may think that those people on coffeegeek.com who warned you about "smoke" were doing it wrong, but make no mistake -- roasting coffee produces a huge amount of smoke and chaff, so don't try this indoors. Finally, toss out the plastic lid that comes with the popcorn popper. The popper will quickly be rendered useless for anything other than its new calling. Here's how to proceed:

Step 1: Load up the popper with a scoop of green coffee beans.
Step 2: Guide the wooden spoon through the glass chimney. In most cases, you'll see that the neck catches the wooden spoon, giving you a simple hands-free way to drop on and pull off the chimney. Place the chimney on top of the popper.
Step 3: Turn on the popper, drop the head of the spoon to the bottom of the bed of coffee, and roll the handle of the spoon between your hands (a la those wooden helicopter toys for kids). It's important to evenly distribute the heat early on in order to avoid any charred beans.
Step 4: After about three minutes, the beans will be done. Apparently the time it takes to complete a roast varies based on humidity, ambient temperature, etc., so all you can really go on is how the beans look. They'll go through a couple of audible cracks, corresponding to loss of moisture and fracturing of the seed's matrix, and you can target just about any degree of roast. I've learned a lot by reading this great visual guide to the stages of roasting, and when you order beans from Sweet Maria's, they always come with recommended roast levels for whatever you've bought.
Step 5: As soon as the beans look good, kill the power, carefully pull off the chimney and set it aside, grab the popper by the bright yellow handle, and dump out the roasted coffee into your colander. Toss the coffee to quickly quench the roast while wandering around your backyard. This step always makes me feel like one of those incense guys at a Catholic mass.
Step 6: Once the coffee has slightly cooled, transfer to a vented tin container or a bag with a gas valve. After the beans are roasted, they give off a bunch of carbon dioxide, so storing the beans in a valved container allows the carbon dioxide to push out all the oxygen, essentially vacuum sealing the coffee overnight. The aroma of a just-opened bag of fresh-roasted coffee is amazing.
Step 7: The coffee will be ready to enjoy after at least 8 hours, but in some cases a day or two is necessary to really develop the flavors. Adding name tags to your bags of coffee is optional but recommended.

Wednesday, May 18, 2011

Almond Raspberry Layer Cake and Siphon Coffee Mach 2


I'm right in the middle of that stretch of your late 20's/early 30's when everybody and their dog is getting married. It's hard on the wallet, but getting to see your friends from every stage of your life more than makes up for it. Sometimes, if you're known for the manly art of baking, generous friends will donate the spillover from their wedding gifts, and a couple of years ago I was lucky enough to receive this gorgeous cake stand.


Sadly, it's about an inch and a half too skinny to fit a standard 9" cake. Month after lonely month, the cake stand stood on its shelf, collecting dust. That is, until I made this amazing almond raspberry cake and realized that some cakes would just be more appetizing if they weren't towering monstrosities.


I latched on to the idea of making a 6" almond raspberry layer cake and slowly worked up to actually buying more cake pans. Boy howdy I'm glad I did -- it's a perfect candidate for a more toned-down cake experience.


As a matter of fact, this cake comes together relatively quickly, especially with half the batter to haul around the kitchen. By far the hardest part is tracking down almond paste. The first time I made this cake, I went to no less than five different stores, including Michaels (shudder), just to try to put my hands on some almond paste. It's in the baking section of your local grocery store, squirreled away on the bottom shelf, defying you to find it.


In other news, I made a pretty amazing discovery at a salvage yard in Oakland a few weeks ago -- a pristine top carafe for an old 8 cup siphon brewer. I cradled it like a newborn all the way back to Boise and, with a new 1000 mL boiling flask and some stuff from the brewer's supply store, created a fully functional siphon coffee brewer. I've been sketching out ideas for a homemade siphon brewer for a few months, and I couldn't be happier with how it turned out.


I can't say enough good things about this cake. The combination of almonds, raspberries, and dark chocolate is pretty tough to beat. Remember not to overmix and keep an eye on the baking time, and if you're not feeling chocolatey, cream cheese frosting would be a good option too. In order to make a full-on 9" layer cake, double the recipe below. Now go out and buy some unnecessary bakeware!


Almond Raspberry Layer Cake
    Ingredients
  • 2 1/4 c cake flour
  • 2 1/4 tsp baking powder
  • 1/2 tsp salt
  • 3.5 oz prepared almond paste
  • 1 1/3 cups sugar
  • 5 oz unsalted butter, at room temperature
  • 1/2 Tbsp almond extract
  • 5 egg whites
  • 3/4 cups whole milk
  • 1/2 cup simple syrup (to keep cake moist))
  • 1/2 cup seedless raspberry preserves

  1. Preheat oven to 350°F. Butter the bottoms and sides of three 6-inch round cake pans. Line the bottom of each pan with a round of parchment or waxed paper and butter the paper.
  2. In a medium bowl, sift together the cake flour, baking powder and salt. Set the dry ingredients aside.
  3. Place the almond paste and sugar in the bowl of a heavy-duty mixer fitted with the paddle attachment, or in another large bowl if using a handheld mixer. Begin to cream the mixture on low speed to break up the almond paste, then increase the speed to medium for about 2 minutes, or until the paste is broken into fine particles.
  4. Add the butter and almond extract and beat it well, then the egg whites, two or three at a time, beating just long enough to incorporate after each addition. Scrape down the sides of the bowl several times to make sure it is evenly mixed.
  5. Dust about a third of the dry ingredients over the batter and fold in with a large rubber spatula until just combined. Fold in about half the milk. Fold in half the remaining flour mixture, followed by the remaining milk. Finally, fold in the last of the dry ingredients just until no streaks of white remain. Use a light hand and do not overmix. Divide the batter among the three prepared cake pans.
  6. Bake for 25 to 30 minutes or until a cake tester or wooden toothpick stuck into the center comes out clean. Let the cakes cool in their pans on wire racks for about 10 minutes. Turn the cakes out on to wire racks, carefully peel off the paper liners and let them cool completely, about one hour.
  7. Assemble the cake: Place one layer flat side up on a cake stand or serving plate. Slide small strips of waxed paper under the edges to protect the plate from any messiness accumulated while decorating. Brush first layer with simple syrup, if using. Spread 1/2 cup of the raspberry preserves over the cake, leaving a 1/4 inch margin around the edges. Repeat with the second layer, brushing syrup if using and using remaining preserves. Add the third layer and brush with syrup if using.
  8. Spread a thin layer frosting of your choice over the top and sides of the cake. Let frosting set in the fridge for about 20 to 30 minutes (this is your crumb coat) then spread a thicker, decorative coat over the base coat. If you have any frosting remaining, pipe a decoration of your choice.

Whipped Bittersweet Frosting

  • 3.5 ounces bittersweet chocolate
  • 1/2 cup heavy cream
  • 2 oz unsalted butter, at room temperature

  1. Melt the chocolate with the cream in a double boiler or metal bowl set over a pan of simmering water. Whisk to blend well. Remove from heat and let stand, whisking occasionally, until the chocolate mixture thickens slightly.
  2. Place the butter in a large mixer bowl and with an electric mixer on medium speed, whip the butter until light and fluffy. Add the chocolate cream and whip until lighter in color and somewhat stiff, about three minutes. Do not whip too long or the frosting may begin to separate.