Sunday, February 12, 2012

Grapefruit Hypocrite Pie


For those of you not lucky enough to have met her, my sister is a badass. She's an amazing singer/songwriter, one of the founders of Girl's Rock Charleston, and just as cute as a button. This past Christmas she knocked it out of the park: not only did she get me a first-edition copy of a flat-out incredible book on old-time North Carolina cooking, but she also splurged on this beautiful copy of the Momofuku Milk Bar cookbook by Christina Tosi.


I was totally enraptured by these books over the holidays, and I immediately started researching and accumulating the slightly out-there ingredients (citric acid, glucose) and equipment (new beater blade, acetate strips) I'd need to get rolling. Since then, I've made four or five recipes out of the Milk Bar cookbook, each one insanely sweet and over the top in its own amazing way, but from day one I had my eye on the grapefruit pie. It took a trip to a Hispanic grocery store in NC to get a hold of the necessary ingredients, but six weeks later, I finally had everything I needed.

This guy traveled a long way to get here.

As I learned from Beth Tartan, a more accurate name for this pie would be a grapefruit hypocrite pie, since the top layer disguises another layer of filling below it. According to the cookbook, the inspirations for this recipe were the Ohio Shaker pie (wherein thinly sliced lemons are tenderized in sugar and salt) and the key lime pie. The translation of these ideas to grapefruit is inspired, and the components work beautifully together.

Blooming the gelatin for the grapefruit passion curd.

The grapefruit pie starts off with a baked Ritz crunch pie shell, which provides the perfect sweet/buttery/salty counterbalance to the citrus explosion of the filling. Next up, a simple curd combines the bright, broadly "fruity" flavor of passionfruit pulp with the creamy mouthfeel of custard filling, into which grapefruit threads are stirred. This step, which involves suprêming the grapefruit (cutting away the rind and pith and slicing between the membranes) and spooning the segments over themselves in a warm, neutral oil, was pure magic.

Suprêming the grapefruit.

Suspended grapefruit threads.

Finally, sweetened condensed milk is curdled with grapefruit juice and citric acid, colored a velvety pink with a single drop of red food coloring, and poured over the grapefruit passion curd. The overall effect is something to behold. Each bite combines the salty, buttery base of the Ritz crackers, pockets of fresh grapefruit juice embedded in a rich pastry cream, and the tart brightness of the key lime pie-inspired top layer. Both the process and result are totally unique and really speak to Christina Tosi's talents.
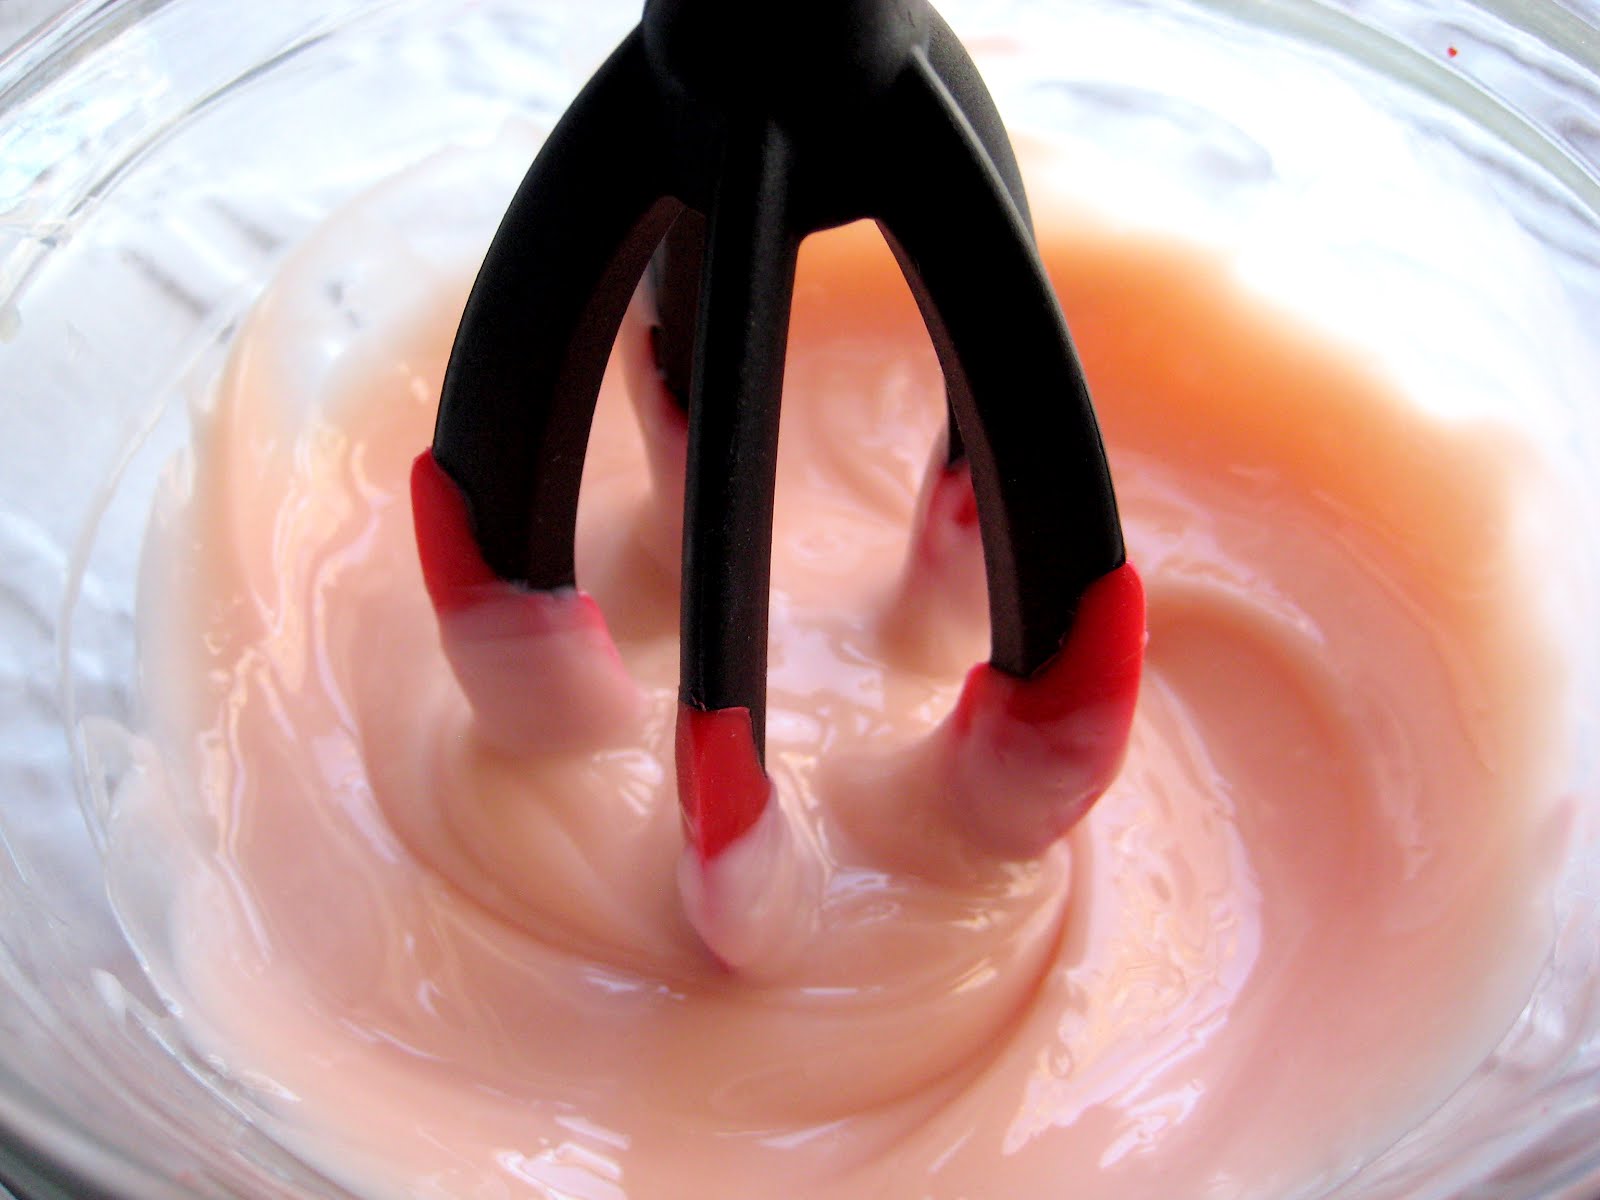
Sweetened condensed grapefruit, featuring my new mixing tool (thanks Hendrens!)

Ritz Crunch Pie Shell
  • 1 sleeve Ritz crackers
  • 1/2 c (100 g) sugar
  • 1/4 c (20 g) powdered milk
  • 1/2 tsp kosher salt
  • 7 Tbsp butter, melted
  1. Heat the oven to 275 deg F.
  2. Crush the Ritz crackers with your hands into small pieces. Combine all the ingredients and press with your hands into a 10" pie pan, making sure to completely cover the bottom and sides of the pan.
  3. Bake the pie shell for 20 minutes until golden brown. Cooled completely, it can be stored, wrapped in plastic, in the freezer for up to 2 months.

Grapefruit Passion Curd
  • 1/4 c (50 g) passion fruit puree, thawed
  • 3 Tbsp (40 g) sugar
  • 1 egg
  • 1/2 gelatin sheet, or 1/4 tsp powdered gelatin
  • 6 Tbsp very cold butter
  • 1/4 tsp kosher salt
  • 1 large grapefruit
  • 1 tsp grapeseed oil, or other neutral oil
  1. Whisk the fruit puree and sugar until the sugar has dissolved.
  2. Add the egg and vigorously whisk until the mixture is bright orange-yellow. Transfer to a saucepan.
  3. Bloom the gelatin by sprinkling evenly over 1 Tbsp of water and letting hydrate for 5 minutes. Heat the passion fruit mixture over low heat, whisking regularly, until it just comes to a boil. The mixture will thicken considerably: once very thick, remove from heat.
  4. Transfer the mixture to a blender and add the bloomed gelatin, butter, and salt. Blend until the mixture is shiny and smooth. Transfer to a heatproof container and allow to cool completely at room temperature, then the refrigerator, for 30 to 60 minutes.
  5. Suprême the grapefruit using the directions above.
  6. Gently warm the grapefruit segments in a small saucepan with the oil. After 2 minutes of gently spooning the grapefruit over itself, the segments will have separated into grapefruit threads.
  7. Stir the grapefruit threads into the chilled curd.

Sweetened Condensed Grapefruit
  • 3/4 c (225 g) sweetened condensed milk
  • 2 Tbsp (30 g) ruby red grapefruit juice
  • 1/2 tsp kosher salt
  • 1/2 tsp citric acid
  • 1 drop red food colering
  1. Combine all ingredients and mix with a rubber spatula, folding until the mixture is homogeneous.
  2. Use immmediately or store in the fridge for up to 2 weeks.
Layer the curd and sweetened condensed grapefruit in the chilled pie shell, smoothing each layer and making sure not to mix the two. Once assembled, either place the pie in the freezer (at which point it can be held, wrapped gently in plastic, for up to one month) or hold in the refrigerator until ready to slice and serve. Allow to fully thaw before serving.

Monday, December 5, 2011

Speculoos

Because there's nothing quite as exciting as seasonal cookies, I present to you a recipe for speculoos, ripped wholesale from the pages of Baked Explorations.


Just like its precursor, this cookbook is solid gold. Almost every recipe has an interesting backstory or a tantalizing gimmick, and the entry for speculoos (alternately "speculaas," as they're called in this cookbook) is no exception. The idea was to recreate those Biscoff cookies you're sometimes lucky enough to get on Delta flights. Biscoff are in fact a brand of speculoos, a Dutch sweetcrust pastry that is traditionally made the day before St. Nicholas' Day, which is celebrated on December 6.


As you can see from the recipe, most of the flavor here comes from cinnamon, with lots of cloves, ginger, and nutmeg to round things out. Obviously such a spice-forward recipe really benefits from using freshly-ground spices. Since these are "shortcrust pastries," sugar is cut into what amounts to biscuit dough (flour, leavener, and cold fat cut into the dry ingredients), which impedes gluten formation and results in a tender yet crunchy cookie. I found that a small cookie cutter (2" diameter at most) ensures that these bake past the soft cookie stage and into more of a ginger snap territory. As you can see, I cut this batch a little too large.


I suggest that you roll these out on a work surface dusted with powdered sugar instead of flour -- you get the same effect, without the taste and texture of unincorporated flour, or you could just use a couple layers of wax paper and save some time on cleanup. Best of all, using cookie cutters means you get to eat all the scraps that bake alongside the deliverables (see also the amazing jam sandwiches from last year). Happy St. Nick's Eve!

Ingredients
  • 1 3/4 c AP flour
  • 1 c packed dark brown sugar
  • 1/2 tsp baking soda
  • 1 1/2 Tbsp cinnamon
  • 1/2 tsp grated nutmeg
  • 1/2 tsp ground cloves
  • 1/2 tsp ground ginger
  • 1/2 tsp salt
  • 10 Tbsp butter, cool but not cold, cut into 1/2-in cubes
  • 1 egg, beaten
  • 1 tsp grated orange zest
  • coarse raw sugar
Directions
  1. Pulse flour, brown sugar, baking soda, baking soda, cinnamon, nutmeg, cloves, ginger, and salt in a food processor.
  2. Drop the butter over the flour mixture and pulse until the consistency of coarse sand.
  3. Add beaten egg and orange zest, and pulse once or twice to combine.
  4. Turn batter out onto a floured work surface and knead the dough until it forms a ball, taking care not to overwork the dough. Wrap the dough in plastic wrap and chill for at least one hour.
  5. Preheat the oven to 350 degrees F. Line two jelly roll pans with parchment paper.
  6. Unwrap and divide dough into halves. Roll one half out on a work surface generously dusted with powdered sugar to a thickness of about 1/4 in. Cut out cookies using a small round cookie cutter and transfer to prepared pans. Repeat with second half of dough.
  7. Generously sprinkle the cookies with coarse sugar and bake for 15 minutes, rotating halfway through. Cookies should be dark brown and appear dry on top.
  8. Transfer cookies to a cooling rack and cool completely before storing in an airtight container.

Wednesday, October 19, 2011

Visual Guide to Home Coffee Roasting


It's been about six months since I started roasting coffee at home, and in that time I've had just about every disaster you can have with such a simple task, barring an actual fire. Broken glass, charred beans, and very loud smoke alarms have given way to a ten minute routine that is not only super fun and simple but also produces consistently amazing results. If you like coffee and have $40 in your pocket, you too can save 60% on your coffee expenses (no really -- I did the math, and it's closer to 62%) and trade up for daily fresh-roasted coffee. Obviously this is an idea whose time as come. You'll need the following:

  1. A popcorn popper. I suggest the Poplite. It's got the right type of mesh at the bottom of the roasting chamber AND is the perfect canvas for the stickers you've amassed over the years.


  2. Wooden spoon with long handle. This one has been in commission for a couple of weeks. Clearly a consumable item, but one that can be replaced for under $2 at your local restaurant supply store.


  3. Metal strainer or colander. Anything will work here.


  4. Green coffee beans. Your every home coffee roasting need can be met by Tom and co. at Sweet Maria's.


  5. Oil lamp chimney. The perfect multipurpose solution to some of the basic difficulties of roasting coffee in a popcorn popper: with the combination of a chimney and a wooden spoon, you have a 3-in-1 stirrer (to make sure the beans don't burn early in the roast), container (to prevent the beans from flying out), and window (to monitor the degree of the roast).
First things first -- the little 1/2 cup scoop that comes with the popper is exactly the right measurement for one batch of coffee. Be careful not to overload the popper or you'll trigger a low-flow sensor and cause the popper to shut down for about 10 minutes. If this happens in the middle of a roast, you get to throw away a batch of incompletely roasted coffee. Also, you may think that those people on coffeegeek.com who warned you about "smoke" were doing it wrong, but make no mistake -- roasting coffee produces a huge amount of smoke and chaff, so don't try this indoors. Finally, toss out the plastic lid that comes with the popcorn popper. The popper will quickly be rendered useless for anything other than its new calling. Here's how to proceed:

Step 1: Load up the popper with a scoop of green coffee beans.
Step 2: Guide the wooden spoon through the glass chimney. In most cases, you'll see that the neck catches the wooden spoon, giving you a simple hands-free way to drop on and pull off the chimney. Place the chimney on top of the popper.
Step 3: Turn on the popper, drop the head of the spoon to the bottom of the bed of coffee, and roll the handle of the spoon between your hands (a la those wooden helicopter toys for kids). It's important to evenly distribute the heat early on in order to avoid any charred beans.
Step 4: After about three minutes, the beans will be done. Apparently the time it takes to complete a roast varies based on humidity, ambient temperature, etc., so all you can really go on is how the beans look. They'll go through a couple of audible cracks, corresponding to loss of moisture and fracturing of the seed's matrix, and you can target just about any degree of roast. I've learned a lot by reading this great visual guide to the stages of roasting, and when you order beans from Sweet Maria's, they always come with recommended roast levels for whatever you've bought.
Step 5: As soon as the beans look good, kill the power, carefully pull off the chimney and set it aside, grab the popper by the bright yellow handle, and dump out the roasted coffee into your colander. Toss the coffee to quickly quench the roast while wandering around your backyard. This step always makes me feel like one of those incense guys at a Catholic mass.
Step 6: Once the coffee has slightly cooled, transfer to a vented tin container or a bag with a gas valve. After the beans are roasted, they give off a bunch of carbon dioxide, so storing the beans in a valved container allows the carbon dioxide to push out all the oxygen, essentially vacuum sealing the coffee overnight. The aroma of a just-opened bag of fresh-roasted coffee is amazing.
Step 7: The coffee will be ready to enjoy after at least 8 hours, but in some cases a day or two is necessary to really develop the flavors. Adding name tags to your bags of coffee is optional but recommended.

Wednesday, May 18, 2011

Almond Raspberry Layer Cake and Siphon Coffee Mach 2


I'm right in the middle of that stretch of your late 20's/early 30's when everybody and their dog is getting married. It's hard on the wallet, but getting to see your friends from every stage of your life more than makes up for it. Sometimes, if you're known for the manly art of baking, generous friends will donate the spillover from their wedding gifts, and a couple of years ago I was lucky enough to receive this gorgeous cake stand.


Sadly, it's about an inch and a half too skinny to fit a standard 9" cake. Month after lonely month, the cake stand stood on its shelf, collecting dust. That is, until I made this amazing almond raspberry cake and realized that some cakes would just be more appetizing if they weren't towering monstrosities.


I latched on to the idea of making a 6" almond raspberry layer cake and slowly worked up to actually buying more cake pans. Boy howdy I'm glad I did -- it's a perfect candidate for a more toned-down cake experience.


As a matter of fact, this cake comes together relatively quickly, especially with half the batter to haul around the kitchen. By far the hardest part is tracking down almond paste. The first time I made this cake, I went to no less than five different stores, including Michaels (shudder), just to try to put my hands on some almond paste. It's in the baking section of your local grocery store, squirreled away on the bottom shelf, defying you to find it.


In other news, I made a pretty amazing discovery at a salvage yard in Oakland a few weeks ago -- a pristine top carafe for an old 8 cup siphon brewer. I cradled it like a newborn all the way back to Boise and, with a new 1000 mL boiling flask and some stuff from the brewer's supply store, created a fully functional siphon coffee brewer. I've been sketching out ideas for a homemade siphon brewer for a few months, and I couldn't be happier with how it turned out.


I can't say enough good things about this cake. The combination of almonds, raspberries, and dark chocolate is pretty tough to beat. Remember not to overmix and keep an eye on the baking time, and if you're not feeling chocolatey, cream cheese frosting would be a good option too. In order to make a full-on 9" layer cake, double the recipe below. Now go out and buy some unnecessary bakeware!


Almond Raspberry Layer Cake
    Ingredients
  • 2 1/4 c cake flour
  • 2 1/4 tsp baking powder
  • 1/2 tsp salt
  • 3.5 oz prepared almond paste
  • 1 1/3 cups sugar
  • 5 oz unsalted butter, at room temperature
  • 1/2 Tbsp almond extract
  • 5 egg whites
  • 3/4 cups whole milk
  • 1/2 cup simple syrup (to keep cake moist))
  • 1/2 cup seedless raspberry preserves

  1. Preheat oven to 350°F. Butter the bottoms and sides of three 6-inch round cake pans. Line the bottom of each pan with a round of parchment or waxed paper and butter the paper.
  2. In a medium bowl, sift together the cake flour, baking powder and salt. Set the dry ingredients aside.
  3. Place the almond paste and sugar in the bowl of a heavy-duty mixer fitted with the paddle attachment, or in another large bowl if using a handheld mixer. Begin to cream the mixture on low speed to break up the almond paste, then increase the speed to medium for about 2 minutes, or until the paste is broken into fine particles.
  4. Add the butter and almond extract and beat it well, then the egg whites, two or three at a time, beating just long enough to incorporate after each addition. Scrape down the sides of the bowl several times to make sure it is evenly mixed.
  5. Dust about a third of the dry ingredients over the batter and fold in with a large rubber spatula until just combined. Fold in about half the milk. Fold in half the remaining flour mixture, followed by the remaining milk. Finally, fold in the last of the dry ingredients just until no streaks of white remain. Use a light hand and do not overmix. Divide the batter among the three prepared cake pans.
  6. Bake for 25 to 30 minutes or until a cake tester or wooden toothpick stuck into the center comes out clean. Let the cakes cool in their pans on wire racks for about 10 minutes. Turn the cakes out on to wire racks, carefully peel off the paper liners and let them cool completely, about one hour.
  7. Assemble the cake: Place one layer flat side up on a cake stand or serving plate. Slide small strips of waxed paper under the edges to protect the plate from any messiness accumulated while decorating. Brush first layer with simple syrup, if using. Spread 1/2 cup of the raspberry preserves over the cake, leaving a 1/4 inch margin around the edges. Repeat with the second layer, brushing syrup if using and using remaining preserves. Add the third layer and brush with syrup if using.
  8. Spread a thin layer frosting of your choice over the top and sides of the cake. Let frosting set in the fridge for about 20 to 30 minutes (this is your crumb coat) then spread a thicker, decorative coat over the base coat. If you have any frosting remaining, pipe a decoration of your choice.

Whipped Bittersweet Frosting

  • 3.5 ounces bittersweet chocolate
  • 1/2 cup heavy cream
  • 2 oz unsalted butter, at room temperature

  1. Melt the chocolate with the cream in a double boiler or metal bowl set over a pan of simmering water. Whisk to blend well. Remove from heat and let stand, whisking occasionally, until the chocolate mixture thickens slightly.
  2. Place the butter in a large mixer bowl and with an electric mixer on medium speed, whip the butter until light and fluffy. Add the chocolate cream and whip until lighter in color and somewhat stiff, about three minutes. Do not whip too long or the frosting may begin to separate.


Wednesday, April 27, 2011

Changeling


About two years ago, one of my best friends asked me to make her a CD of stuff from the 80's. With our shared love of Siouxsie & the Banshees in mind, I spent way longer than planned on growing my post-punk collection and exploring the depths of the stuff I already had. Hope it was worth the wait!


Changeling


That's Howard Devoto, one of the founding members of the Buzzcocks. After Spiral Scratch came out in 1976, Devoto saw that punk was just a flash in the pan, so he left the band and formed Magazine alongside John McGeoch, who later joined Siouxsie & the Banshees, and a keyboard player named Dave Formula. McGeoch was an insanely talented guitarist in a world where 3-chord punk was the norm (Devoto hired him after watching him play all the lead guitar parts of Television's Marquee Moon front to back). Dave Formula was an unknown entity, and since nobody else in the band knew anything about synths, he had total control over that aspect of their sound. The albums they put out between '78 and '80 were perfect examples of the amazing creativity that blossomed in the aftermath of punk.


John McGeoch and Siouxsie Sioux


Even without any context, post-punk music is great, but part of what makes it so appealing and enduring is that punk's DIY message really caught on in Britain, totally revitalizing the musical landscape. The sleeve for one of Scritti Politti's early EPs wrote out its production costs and the contact info for local record pressing plants. The Desperate Bicycles sang, "it was easy, it was cheap, go and do it!" Lucky for us, truly great bands like the Homosexuals, who still sound years ahead of their time, remain in distribution thanks to labels like Messthetics. At the time, crap keyboards were cheaper than guitars, and if the Shaggs taught us anything, it's that you don't have to be good at your instruments to make good music.


Scritti Politti's "4 A-Sides"


One of the reasons this music sounds so great is because nobody had any idea what they were doing. Case in point: in the early days of Devo, the band couldn't find the keyboards they wanted, so they built their own hardware from scratch. While on stage, sweat would pour down the sleeves of their full-body plastic suits, frying their equipment and causing totally unreproducible sounds. I think that's a great way to illustrate what happened when punk kids started picking up synthesizers.


Devo


This compilation isn't meant to be a primer on the DIY movement or the origins of synth-pop (if that's what you're after, watch the BBC's amazing Synth Britannia) -- it's more about what happened when guitar-heavy bands (e.g. the Buzzcocks) started incorporating keyboards (e.g. Magazine), before people really knew how to market pure synth pop a la the Human League and their legion imitators. The chugging glam riff, handclaps, and wobbly square-wave vrrrring during the bridge of "The Machman," the way the guitars chime into the airy synth opening of "Second Skin," the back-to-back wall of John McGeoch awesomeness that is "My Tulpa"/"Head Cut" -- with so many amazing jams to decide among, you understand why this project took so long.


Sandwell District


Lately I've been listening to a lot of deep house and techno music, and some of my favorite stuff is being released by a label called Sandwell District. During an interview, the two guys who run the label said that they both draw inspiration from early post-punk, and you can actually trace a line from then to now: Joy Division's guitars were replaced by the opening 4/4 beat of Blue Monday, and guys like Sandwell District are only following that trajectory.

Download


Changeling

  1. Men Without Hats - Ban the Game
  2. Ultravox - Slow Motion
  3. Positive Noise - Hypnosis
  4. Joy Division - Isolation
  5. Pete Shelley - I Generate a Feeling
  6. Tubeway Army - The Machman
  7. Simple Minds - Changeling
  8. The Teardrop Explodes - Ha Ha I'm Drowning
  9. The Sound - Heartland
  10. The Chameleons - Second Skin
  11. Spoons - Nova Heart
  12. Japan - Quiet Life
  13. New Order - The Village
  14. Magazine - My Tulpa
  15. Siouxsie & the Banshees - Head Cut
  16. Echo & the Bunnymen - In Bluer Skies
  17. Ultravox! - Hiroshima Mon Amour

Friday, February 18, 2011

Siphon Coffee Brewing and Hazelnut Cinnamon Biscotti


Apparently when I was a kid, I thought that coffee was the last socially acceptable addiction, but thanks to a recent obsession (see also: dub music), now I get why.


One of the joys of living near the west coast hot spots is that the guys (it's always guys) who are into coffee take it to a flat-out ridiculous level of obsession. I went to Stumptown Annex in Portland last week, and while checking out their bean selection, I casually told the counter guy that I was just getting into coffee and was interested in knowing more about the broad flavor trends between the big global coffee-producers (Central America, Southeast Asia, Africa). Lord love him, but he was totally incapable of dumbing it down for me. He said that making those kind of generalizations would be like asking what "wine from Europe" was like.


So I'll be the first to admit that I don't really know anything about coffee: up until a few months ago, I didn't really drink much coffee at all. All that changed with the first cup of coffee I made with my siphon brewer (which I found, new in the box, at the Boise flea market for $10).


I'll admit, even if I didn't I love the process -- like my friend Trey says, it's coffee theater -- and appreciate the fact that it's a great justification for indulging my love for scientific glassware, brewing coffee this way would be a waste of time if it didn't make super good coffee. My little Hario didn't disappoint.


I could never explain the process as well as the impressively-produced little video below, but the point is that the water in the brewing chamber never reaches the boiling point, so most of the bitter compounds stay in the coffee. The result is a bright, floral flavor with lots of salty, caramel-y body. I just tried an Ethiopian varietal from Stumptown that actually tasted like raspberries. Another varietal from Kenya is described as having "notes of kiwi, cocoa, pineapple and raw sugar in a cup redolent of dried flowers."


Is it all psychosomatic? Why would it be for coffee and not for wine or scotch? Admittedly, all these flavors are really subtle (it is black coffee, after all) but the fact that I can taste even one or two of them is pretty exciting. And, my brewer and hand grinder are both from Japan. The New York Times would be proud. Next, I wanted to bake something to complement my labor of love, and guess what? Biscotti go really well with coffee!


This recipe from Baked is basically perfect. Warm cinnamon, creamy hazelnuts, semisweet chocolate, and black coffee? I made another recipe alongside these (white chocolate and dried cranberries with semolina flour), but they were so sad next to the world's best biscotti that I couldn't muster up the heart to take any good pictures of them. My best advice when making these is to use plenty of parchment paper. A paper sling makes transferring the dense dough much easier.


Hazelnut Cinnamon Biscotti
    Ingredients
  • 1 1/3 c sugar
  • 1 1/4 tsp baking powder
  • 1 1/4 tsp salt
  • 1 tsp cinnamon
  • 4 large eggs
  • 2 tsp vanilla extract
  • 3 1/4 c AP flour
  • 1 1/2 c blanched hazelnuts, toasted
  • 1 3/4 c (10 oz) semisweet chocolate chips
  • 1 egg white
    Directions
  1. Preheat the oven to 350 degrees F. Line a baking sheet with parchment paper.
  2. In a small bowl, whisk together the sugar, baking powder, salt, and cinnamon.
  3. Beat the eggs and sugar in an electric mixture until the color is uniform and the mixture thick. Add the vanilla and beat for 5 seconds. Add the flour in two batches and beat until just combined. Scrape down the bowl, add the hazelnuts and chocolate chips, and beat until just combined.
  4. Turn the dough out onto parchment paper. Use a dough scraper to form into a log about 16" long, 3 1/2" wide, and 3/4" thick. Smooth the top with an offset spatula. Bake for 20 to 25 minutes until firm but not browned. Cool for 10 minutes.
  5. Lower the oven to 325 degrees F. While the log cools, whisk together the egg white and 2 Tsp of water and apply the egg wash to the top of the dough with a pastry brush.
  6. Cut the log into 3/4" slices with a serrated knife. Lay the biscotti on a parchment paper-lined baking sheet, cut side down, and bake for 25 minutes. Cool completely on a wire rack.

Monday, December 20, 2010

Jam Sandwiches


I have a confession to make -- I don't really like Christmas cookies. I love cutting them out, decorating them with my mom and sister, making the goopy colored frosting, but at the end of the day, they taste like straight butter and flour. I had given up on Christmas cookies until, on a whim, I opened up my Baking Illustrated cookbook and, lo and behold, I found the greatest Christmas cookies of all time: jam sandwiches.


It turns out the secret ingredients for the perfect sugar cookie are a) superfine sugar, b) two sticks of butter, and c) cream cheese. As always a stand mixer takes all of the guess work out of making these, and liberal use of parchment paper makes rolling/cutting/cleanup incredibly easy. Be sure to refrigerate the dough in between steps and to eat one of the cookie holes right when it comes out of the oven. I think I've found my favorite cookie recipe ever.


Jam Sandwiches
    Ingredients
  • 2 1/2 c (12 1/2 oz) AP flour
  • 3/4 c (5 1/2 oz) superfine sugar (granulated sugar, pulverized in the food processor for 30 sec)
  • 1/4 tsp salt
  • 16 Tbsp (2 sticks) unsalted butter, softened but still cool, cut into sixteen 1/2" pieces
  • 2 tsp vanilla extract
  • 2 Tbsp cream cheese, at room temperature
  • 2 Tbsp turbinado, Demerara, or white decorating sugar
  • 1 1/4 c (12 oz) raspberry jam, strained
    Directions
  1. In the bowl of an electric mixer, mix the flour, sugar, and salt at low speed until combined. With the mixer running on low, add the butter a piece at a time. Continue to mix until the mixture looks crumbly and slighty wet. Add the vanilla and cream cheese and mix for another 30 seconds.
  2. Knead the dough by hand in the bowl for a few turns, then turn the dough out onto the countertop. divide in half and wrap each half in plastic and refrigerate for at least half an hour.
  3. Heat the oven to 375 degrees. Roll out one half of the dough to an even 1/8" thickness between 2 large sheets of parchment paper. Slide the rolled tough, still on the parchment, onto a baking sheet and refrigerate until firm, about 10 minutes. Meanwhile, repeat with the rest of the dough.
  4. Cut out the cookies with a 2" round cookie cutter and transfer to a parchment paper-lined baking sheet. Bake for 8 to 10 minutes, rotating the sheet halfway through, until the cookies are golden brown. Roll out the the remaining dough, sprinkle the sugar over the dough, and use a 3/4" round cookie cutter to cut out the centers of the rounds. Bake as before.
  5. When the cookies have cooled, add about 1 tsp of jam on the base cookies and put the cut-out cookies on top. Let stand until set, about 30 minutes.

Secret bonus song I made on my Kaossilator while making these this weekend:

Tuesday, November 23, 2010

Sound and Vision - Fra Angelico and Britten


The Annunciation, Fra Angelico (1437-1446)

It's nice to have such a cultured family. My mom loves medieval and early Renaissance painting, especially Fra Angelico, and she passed a lot of that appreciation on to me and my sister, who got her BA in art history. One of my favorite trips we've ever taken together was to the Cloisters in NYC. Not only do my mom and sister love art, but my brother is a music professor, and every once in a while he sends me some of the music he's working on, like the Faure songs I've posted here. He's currently coaching the second of five canticles Benjamin Britten wrote for tenor, countertenor, and piano. The original text for this piece is taken directly from Chester's mystery plays, a cycle of 15th century plays based on biblical texts.

The connection between the Britten piece and the Fra Angelico painting isn't just the concurrence of the art and the text, it's their shared depiction of contact with the supernatural. Everything about the Fra Angelico painting is otherworldly, from the over-sized figures and Gabriel's rainbow wings to the beauty of the painting itself (and, you know, the whole idea of the annunciation to begin with), and Britten's portrayal of the voice of God at the beginning of this piece is almost scarily awe-inspiring.


Britten's Canticle II - Abraham and Issac

Saturday, October 9, 2010

Mussamun Curry Paste


My brother and his wife got me a great curry cookbook for Christmas a few years ago, and after opening it up the other day, I got hungry for some labor-intensive Indian food. In the back are a few recipes for curry paste (red, green, yellow) and one for "Thai-Style Mussamun Curry Paste" that serves as a base for an interesting curry containing chicken, potatoes, and peanuts. After looking at the ingredient list I knew I had to make it.


This paste has a bunch of sweet spices and an undercurrent of a kick from the dried chiles. Apparently it some ceremonial purposes in Thailand (weddings, births, ordinations of Buddhist monks), and it tastes pretty incredible. All the up-front work you put in pays off, since making homemade curry is so quick with some curry paste on hand. I happend to have all the whole spices (except for the turmeric), so I went overkill: here's a photo of some cardamom pods I cracked open, just to give you an idea of how far you can take this recipe if you're in the mood.


The Mussamun curry recipe in this cookbook calls for 2 cans of coconut milk, 2 lbs cut up chicken breast, 1 large peeled, chopped potato, and 1 onion cut into chunks, along with 1/2 c dry-roasted salted peanuts, 2 Tbsp brown sugar, 3 Tbsp dissolved tamarind paste, 2 Tbsp lime juice, and salt to taste. Combine 5 Tbsp curry paste with 1/2 c of coconut milk over medium-high heat, lightly brown the chicken, then add everything else besides the lime juice. Bring to a boil, simmer for 15 to 20 minutes, add the lime juice, and serve with basmati rice. FYI, I also made this with a couple of blocks of cubed, pan-fried extra firm tofu (frozen overnight, thawed during the day, and hand-squeezed dry), adding the tofu a few minutes before taking the curry off the heat, and it was at least as good as the original recipe.


Thai-Style Mussamun Curry Paste
    Ingredients
  • 15 small dried red chili peppers (chiles de arbol, the slender ones about the size of your pinkie)
  • 2 tsp ground cumin
  • 1 tsp ground coriander
  • 1 tsp ground black pepper
  • 1 tsp ground nutmeg
  • 1 tsp ground cardamom
  • 1/2 tsp ground cloves
  • 1/2 tsp ground turmeric
  • 2 tsp salt
  • 1/2 c coarsely chopped onion
  • 1/2 c chopped garlic
  • 3 Tbsp minced fresh lemongrass (the white sections of about 3 stalks)
  • 1 tbsp minced fresh ginger
  • few Tbsp water
    Directions
  1. Stem the chilies, remove the seeds, and cut them into small pieces using kitchen shears. There will be about 1/4 c of dried chilies. Place in a small bowl and add warm water to cover, then soak for about 15 minutes. Drain and set aside.
  2. Meanwhile, combine cumin and coriander seds in a small, dry frying pan. Toast over medium heat for 1 to 2 minutes, stirring often, until fragrant and slightly darkened. Remove from heat and combine with the rest of the spices. In a food processor, combine the onion, garlic, lemongrass, ginger, 2 Tbsp of water, drained chilies, and the spice mixture. Process to a fairly smooth, evenly colored-paste.
  3. Transfer to an airtight jar and seal. Refrigerate until needed for up to 1 months, or freeze for up to 6 months.

Tuesday, August 3, 2010

Indian Skillet Black-Eyed Peas


Ever since my awesome friends Erik and Kelly turned me on to Moosewood Restaurant's New Classics cookbook I have been cooking from it compulsively. Every single recipe, except for one bland potato/pasta/pesto dish, has been a showstopper. This recipe for spiced black-eyed peas is one of my favorites.


Like most fun recipes, this one has a couple of secret ingredients: tamarind paste, which is pretty easy to find in a Whole Foods/co-op/ethnic grocery, and ground cardamom. It's definitely a little more effort to buy cardamom pods, pound them open, fish out the flavor crystals, and grind them by hand, but it smells and tastes amazing. You know that moment when you throw a bunch of spices into a pan of hot oil and onion and garlic? This recipe dials that moment up to 10.


I really went overboard with my favorite spices, easily doubling the amount of fresh ginger and cardamom. Any way you make it, this recipe has an amazing flavor profile and is one of the most satisfying bean dishes I've ever made. Score another one for Moosewood!

Ingredients
  • 2 Tbsp vegetable oil
  • 1 c chopped onions
  • 1 clove garlic, minced
  • 1 Tbsp minced fresh ginger
  • 1/4 tsp cayenne
  • 1/4 tsp ground cinnamon
  • 1/4 tsp ground cardamom
  • 1/4 tsp ground coriander
  • 1 tsp salt
  • 1 tsp tamarind concentrate, dissolved in 1 c warm water
  • 3 c cooked black-eyed peas (equal to two 16 oz cans, rinsed and drained)
  • 1/2 c chopped fresh tomatoes
  • 2 c rinsed and chopped fresh spinach

Directions
  1. Heat the oil over medium-high heat in a large skillet or nonreactive saucepan. Add the onions and garlic and saute on medium-high heat until the onions are soft and beginning to brown, about 10 minutes.
  2. Add the ginger, cayenne, cinnamon, cardamom, coriander, and salt and mix well. Stir in the water and tamarind and black eyed peas, cover, and simmer for about 10 minutes.
  3. Add the tomatoes and spinach and cook just until the spinach wilts, about 1 minute. Serve immediately.

Tuesday, June 29, 2010

Strawberries, Two Ways


Strawberry Shortcakes, c/o Baking Illustrated

A few weeks ago, at the height of strawberry season, I was eating strawberries with everything (especially Greek yogurt). This having been my first strawberry season with my new copy of Baking Illustrated in hand, I knew I had to make their strawberry shortcakes. They turned out great - slightly sweetened biscuits, mascerated strawberries, a generous portion of whipped cream - just about everything you'd want. Thankfully, my obsession didn't stop there.


Strawberry Brown Butter Bettys, c/o Smitten Kitchen

Just as this unbelievably delicious and easy banana bread cobbler recipe rendered banana bread obsolete, the strawberry brown butter bettys on smittenkitchen.com were so perfect that I'll probably never make strawberry shortcakes again. Still, both of these recipes are well worth your time.

    Fruit
  • 8 c strawberries, hulled
  • 6 Tbsp sugar
    Shortcakes
  • 2 c (10 oz) AP flour
  • 5 Tbsp sugar
  • 1 Tbsp baking powder
  • 1/2 tsp salt
  • 8 Tbsp cold unsalted butter, cut into 1/2-in cubes
  • 1 egg, lightly beaten
  • 1/2 c plus 1 Tsbp half-and-half or whole milk
  • 1 egg white, lightly beaten
  • 2 c whipped cream (+ 1 tsp vanilla)
    Directions
  1. For the fruit: Crush 3 cups of the hulled strawberries with a potato masher. Slice the remaining 5 cups of berries and stir into the crushed berries, along with the sugar. Set the fruit aside and mascerate for at least 30 minutes and up to 2 hours.
  2. For the shortcakes: Set an oven rack to the lower-middle position and preheat to 425 degrees. Pulse the flour, 3 Tbsp of the sugar, baking powder, and salt in a food processor. Scatter the cold butter over the dry ingredients and pulse until it resembles coarse meal, about fifteen 1-second pulses. Transfer to a medium bowl.
  3. Mix the beaten egg and half and half in a mesuring cup. Add the egg mixture to the dry ingredients and mix until large clumps are formed. Turn onto a floured work surface and lightly knead until combined.
  4. Pat the dough until a 9"x6" rectangle, about 3/4" thick, making sure not to overwork the dough. Cut out 6 dough rounds with a 2 3/4" biscuit cutter. Brush with beaten egg white, and sprinkle with remaining sugar.
  5. Bake until golden brown, 12 to 14 minutes. Place the baking sheet on a wire rack and cool until warm, about 10 minutes.
  6. Split each shortcake, portion fruit over the bottom, add a dollop of whipped cream, and cap with the cake top.

Sunday, May 23, 2010

Serious Moonlight


Serious Moonlight

My friend Darcy and I have an inexplicable attachment to the lyric about the "serious moonlight" in Bowie's "Let's Dance". Last month we were both at our mutual friends' wedding, and that's the song they chose for their first dance. For whatever reason, that lyric embedded itself into my brain. After that night I was super inspired to put together a compilation that evokes nighttime and all that it entails: dreams, sleep, sex, confusion, and, of course, field recordings of frogs. It's meant to be listened to at dusk with the lights out and the windows open. As usual, just unpack the zip file and drag the songs into iTunes, and they'll sort themselves in the Mixes genre under "Serious Moonlight".
  1. The Moody Blues - The Sun Set (3.03)
  2. Arovane - Tomorrow Morning (1.46)
  3. Serge Gainsbourg - Valse de Melody (1.32)
  4. Leila - Something (1.29)
  5. The Durutti Column - Sleep Will Come (1.49)
  6. Euros Childs - Roedd Hi'n Nofio Yn Y Bore Bach (3.30)
  7. David Sylvian - The Heart Knows Better (7.52)
  8. Linda Perhacs - Parallelograms (4.34)
  9. Colin Blunstone - Her Song (3.31)
  10. Matt Sweeny & Bonnie 'Prince' Billy - Blood Embrace (7.57)
  11. The Clientele - Lamplight (6.44)
  12. Datacide - Flashback Signal (15.55)
  13. Björk - Headphones (5.40)